A well-equipped civil engineering laboratory is the backbone of any reputable engineering programme. It is where theory becomes practice, where students develop the experimental skills they'll carry into a career building roads, bridges, water systems and skyscrapers. But setting up a civil lab is a serious undertaking — one that demands careful planning, generous budgeting and the right partner for equipment supply.
This guide walks through the essential considerations for institutions, polytechnics and TVET centres planning a new civil engineering lab, or upgrading an existing one. Whether you are responsible for a small departmental setup or leading a multi-million-dollar tender, the principles below will help you build a lab that delivers educational value for decades.
1. Map the Curriculum to Equipment
The first principle of lab design is curriculum alignment. Each subject in your civil engineering syllabus — soil mechanics, concrete technology, transportation engineering, hydraulics, surveying — demands a specific suite of equipment. Resist the temptation to over-spec or chase the trend: every machine should map directly to a learning outcome in the curriculum.
A typical civil engineering lab covers six core areas:
- Soil Testing Lab — California Bearing Ratio (CBR), shear, compaction, permeability, consolidation
- Concrete Testing Lab — compression testing, slump, mixers, vibrators, NDT equipment
- Bitumen & Highway Lab — Marshall stability, penetration, ductility, softening point
- Aggregate Testing — impact, crushing value, Los Angeles abrasion, sieve analysis
- Hydraulics & Fluid Mechanics — bench, pumps, turbines, flow measurement
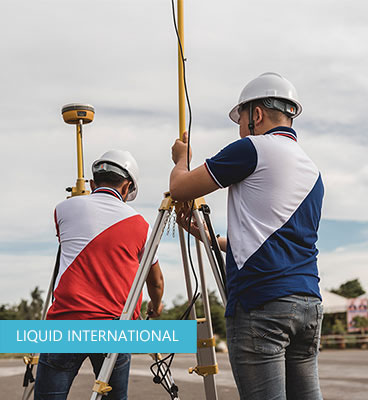
- Surveying & Geomatics — total stations, theodolites, levels, GPS
2. Plan the Physical Layout
Civil labs are space-hungry and contain heavy equipment. Compression testing machines can weigh several hundred kilograms; soil testing rooms accumulate water, dust and remnants. Plan for proper drainage, dedicated power circuits, isolated vibration foundations for precision instruments, and adequate ventilation.
"A lab that's safe and ergonomic encourages students to actually use the equipment. A lab that's cramped, dim or hazardous becomes an obstacle to learning — no matter how good the kit is."
For a department running 4 batches of 30 students, plan a minimum of 100–120 square metres for soil + concrete + bitumen testing combined, plus a dedicated 60–80 m² hydraulics lab. Surveying needs only basic indoor storage but requires open field access for practical sessions.
3. Build the Equipment List Strategically
A well-built equipment list is hierarchical: essential (no lab can function without these), standard (expected by accreditation bodies), and advanced (research and final-year projects). Many institutions over-invest in advanced equipment that students rarely touch, while skimping on essentials that get daily use.
Essential equipment (Phase 1)
If your budget is limited, focus first on a digital compression testing machine, a CBR apparatus, a sieve shaker with full sieve set, slump cone and concrete moulds, a Marshall stability machine, an aggregate impact value tester, a hydraulics bench with at least three test attachments, and a few good auto levels and theodolites. With this list, you can run 80–90% of an undergraduate civil curriculum.
Standard equipment (Phase 2)
Triaxial test machines, direct shear apparatus, concrete mixers and vibrating tables, Schmidt rebound hammers, ultrasonic pulse velocity testers, Los Angeles abrasion machines, full pump and turbine test rigs and an electronic total station.
Advanced equipment (Phase 3)
Automated triaxial systems, dynamic cone penetrometers, environmental SEM imaging for materials research, GNSS systems for advanced surveying. These are typically funded through research grants rather than core budget.
4. Budgeting Realistically
Civil engineering lab equipment is expensive because of its build quality and longevity. A reasonable benchmark for a complete undergraduate civil lab serving four batches of students is between USD 80,000 and USD 180,000 depending on the equipment grade, brand origin and ancillary items (work benches, storage, software, training).
Don't forget hidden costs: shipping, customs duties, installation, calibration, operator training, spare parts inventory, and annual maintenance. As a rule of thumb, add 25–30% to the equipment list price for total project cost.
5. Choosing a Supplier
The supplier you choose matters as much as the equipment itself. Equipment from a manufacturer that doesn't honour warranties or supply spare parts becomes scrap within years. Look for these signals:
- In-house manufacturing rather than reseller-only operations — you want to talk to the people who actually build the kit
- Reference list of comparable institutions, ideally in your region
- Spare parts and service network — ask specifically about lead times for common consumables and replacement parts
- Training capability — can they send engineers for trainer-of-trainers? Do they provide lab manuals?
- Documentation quality — calibration certificates, conformance to ASTM/IS/BS/EN standards, electrical safety certificates
6. Installation, Commissioning and Training
Once the equipment arrives, professional installation is essential. Compression testing machines must be levelled to within fractions of a millimetre. Hydraulic benches need to be plumbed correctly. Total stations need calibration before first use. A reputable supplier will include installation in the contract or offer it as a structured service.
The most overlooked element is trainer-of-trainers. Your lab is only as effective as the instructor running it. Insist on a minimum 3–5 day on-site training programme covering operation, routine maintenance, troubleshooting and lab manual delivery.
7. Plan for Maintenance from Day One
The most common failure mode for civil labs isn't equipment breakdown — it's institutional neglect. Build maintenance into the budget from the start: an annual maintenance contract (AMC), a small spare parts inventory, calibration cycles for precision instruments, and a designated lab technician with the time and skills to keep the lab running.
Conclusion
Setting up a civil engineering lab is far more than a procurement exercise. It is the construction of a learning environment that will shape thousands of engineers over its lifetime. With careful curriculum mapping, smart phasing of investment, the right supplier partnership and a serious commitment to maintenance, the lab you build today can serve your institution for 15–20 years.
If you're planning a civil engineering lab project, our team at Liquid International is happy to share equipment lists, layout suggestions and detailed quotations tailored to your curriculum and budget. We've helped institutions in 65+ countries build civil labs that run, and run well.
Need help with your lab project?
Our engineering team has helped institutions in 65+ countries plan, equip and commission engineering, scientific and TVET laboratories. We'd be glad to discuss your project.
Talk to Our Team